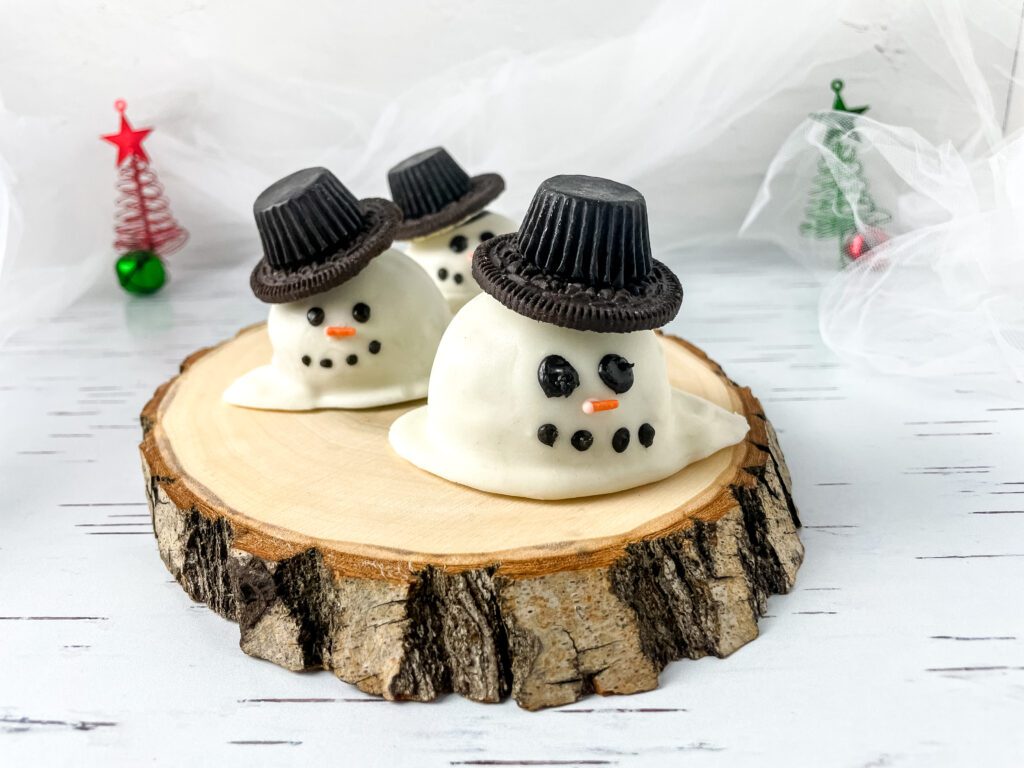
You might be wondering how to elevate your holiday dessert game this season. Cookie Dough Snowman Truffles offer a unique blend of indulgence and creativity, combining the beloved flavors of cookie dough with a festive presentation. As you prepare these delightful treats, you’ll find that their charm lies not only in their taste but also in the way they capture the spirit of the holidays. But before you start shaping those snowmen, there are essential ingredients and techniques you’ll want to consider that can truly make a difference in the outcome.
Ingredients You’ll Need
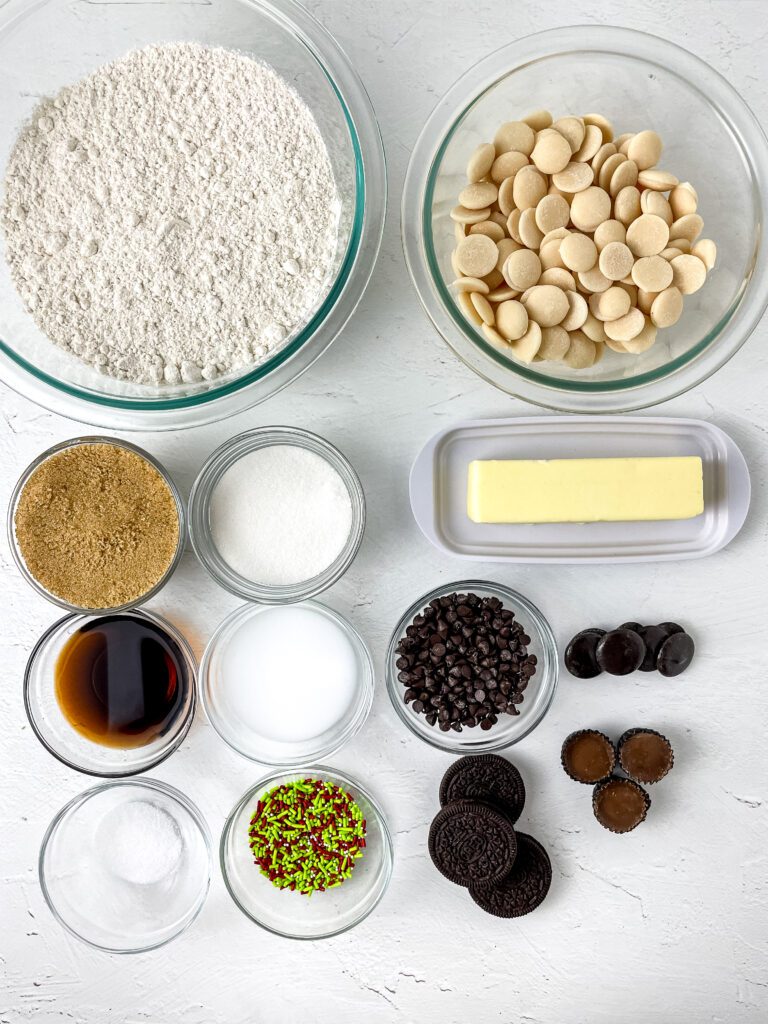
To create your delightful Cookie Dough Snowman Truffles, you’ll need a handful of essential ingredients. Start with pantry staples like flour, sugar, and butter to form a safe-to-eat cookie dough base.
You’ll also want to grab some high-quality white melting chocolate and dark melting chocolate to achieve that smooth, glossy finish on your snowman treats.
For the decorative touches that make these holiday treats truly shine, consider adding orange sprinkles for the noses. They’ll bring your snowmen to life! You can also use mini Reese’s Cups or Oreos for their adorable hats, adding a festive flair to each truffle.
Don’t forget to stock up on sprinkles or edible eyes for those charming facial features. These tiny details elevate your cookie dough snowmen, transforming them from simple truffles into eye-catching holiday delights.
As you gather your ingredients, remember that quality counts. Opt for fresh ingredients to ensure your snowman treats taste as delightful as they look.
With these essentials in hand, you’ll be well on your way to crafting the perfect festive indulgence for your holiday gatherings!
Preparing the Cookie Dough
When you’re ready to prepare the cookie dough, start by creaming together the softened butter and sugar in a mixing bowl until the mixture is light and fluffy. This step is crucial for achieving the right texture.
Once that’s done, gradually add in the flour, mixing just until combined. Make sure you don’t overmix, as this can make the dough tough.
Next, stir in a pinch of salt and a splash of vanilla extract for flavor. If you want to enhance the taste, consider adding a few tablespoons of milk or a sprinkle of chocolate chips for extra sweetness.
Now, it’s time to combine everything until you have a smooth, cohesive dough. You should be able to handle it without it sticking excessively to your hands.
Once your dough is ready, cover it with plastic wrap or place it in an airtight container. Chill it in the refrigerator for about 30 minutes. This resting time helps the flavors meld and makes it easier to work with later.
After chilling, you’ll be all set to move on to the fun part—shaping your truffles into adorable snowmen!
Shaping the Snowman Truffles
Shaping the snowman truffles is where the real fun begins! Start by scooping out portions of your prepared cookie dough using a cookie scoop or your hands. Aim for about two tablespoons for each truffle, which will create a nice, round base. Roll the dough into a ball, making sure it’s smooth and compact.
Once you’ve shaped the base, create the head by taking a smaller portion of dough, about one tablespoon, and rolling it into a smaller ball. Gently press the head onto the larger body to create the snowman shape. If you want to get creative, you can slightly flatten the top of the larger ball to help the head sit more securely.
To make your snowman even more unique, consider adding a bit of dough for arms. Roll small pieces of dough into thin cylinders and attach them to the sides. This step adds character and charm to your truffles!
After shaping, place your assembled snowmen on a parchment-lined baking sheet and chill them in the fridge for about 30 minutes. This will help them firm up and hold their shape before you start decorating.
Decorating Your Truffles
Now that your snowman truffles are chilled and ready, it’s time to bring them to life with some fun decorations!
Start by melting your high-quality white chocolate, then dip each truffle in the chocolate to coat it evenly. Let the excess chocolate drip off before placing them on a parchment-lined tray to set.
Once the white chocolate is firm, grab your black melting chocolate for the eyes and buttons. Use a piping bag or a toothpick to carefully add small dots for those charming facial features.
Next, take a sprinkle of orange for the noses; a tiny piece will do the trick!
For the hats, you’re in for a treat. Grab some mini Reese’s Cups or Oreos and place them on top of the truffles, securing them with a bit of melted chocolate if needed. This adds a delightful touch and a festive flair.
Lastly, feel free to get creative! Use festive sprinkles, edible glitter, or even candy canes as accessories. Each truffle can be unique, so let your imagination run wild while you decorate your snowy friends!
Serving and Storing Tips
Serving your Cookie Dough Snowman Truffles is all about presentation and enjoyment. Arrange your truffles on a festive platter or a decorative cake stand to make them visually appealing. You might even add some shredded coconut or powdered sugar around them to mimic snow, enhancing the wintery theme.
For an interactive experience, consider placing skewers or toothpicks in each snowman so guests can easily pick them up.
When it comes to storing your truffles, keep them in an airtight container in the fridge. This will maintain their freshness and prevent them from drying out. They’ll stay delicious for about one week.
If you want to extend their shelf life, you can freeze them for up to three months. Just make sure to separate layers with parchment paper to prevent sticking.
Before serving frozen truffles, let them thaw in the fridge for a few hours. This ensures they retain their creamy texture.
If you’re planning to serve them at a party, you could prepare them a day in advance, allowing you to enjoy the festivities without last-minute stress. Your guests will love these sweet creations, making your effort well worth it!
Conclusion
Now that you’ve made your Cookie Dough Snowman Truffles, it’s time to enjoy these festive treats! Whether you’re sharing them at a holiday gathering or savoring them at home, they’re sure to bring smiles. Remember, you can store any leftovers in an airtight container or freeze them for later. Have fun decorating and creating your snowman family, and don’t forget to get creative with your designs. Happy holidays and enjoy your delicious creations!

Cookie Dough Snowman Truffles
Equipment
- Measuring Cups
- Measuring Spoons
- Hand or Stand Electric Mixer
- Spatula
- Microwave Safe Bowls
- Ice Cream Scoop https://a.co/d/4oj34RG
- Fork
- Piping bags https://a.co/d/cj5TuPl
- Parchment Paper
- Cookie Sheet https://a.co/d/8s1EwQu
- Small Scissors
Ingredients
- 1 1/2 Cups of Flour
- 1/2 Cup of Room Temperature Butter
- 2-3 Tablespoons of Milk
- 1/2 Cup of Brown Sugar
- 1/4 Cups of Sugar
- 1 Teaspoon of Vanilla extract
- 1 Teaspoon of Salt
- 1/2 Cup of Chocolate Chips
- 12 Ounces of White Melting Chocolate
- 2 Ounces of Black melting Chocolate
- Orange Sprinkles
- Red White and Green Sprinkles
- Reeses Cups
- Oreos Cookies
Instructions
- -Preheat your oven to 350 degrees.
- -Line a cookie sheet with parchment paper and spread the flour evenly across the parchment paper.
- -Heat the flour for 5 minutes, let it sit out to cool down completely.
- -Put the butter and sugar in a bowl and mix it for 3-4 minutes.
- -Next add in the vanilla and mix for 1 minute.
- -Now add the flour and salt, mix to combined.
- -Pour in the milk and mix until you get a soft cookie dough texture.
- -Next fold in your chocolate chips using a spatula.
- -Then scatter your sprinkles over the dough and gently fold them in the dough but do not mix to much.
- -Use a spoon or ice cream scooper to scoop the dough into a ball and place it on a cookie sheet lined with parchment paper. The balls should be around 2 tablespoons each.
- -Place the dough balls in the fridge for 10 minutes to make sure they hold their shape.
- -Put your white chocolates melts in a large microwave safe bowl and warm then in 30 second intervals until they are liquified.
- -Put using a fork, dip the ball of cookie dough in the chocolate. And then place it back on the sheet of parchment. Do not wipe off the excess chocolate from the bottom of the dough ball. You want the extra chocolate to create a puddle around the the snowman.
- -Repeat this step for all the cookie dough balls and then put them in the fridge for 10 minutes to solidify.
- – Once the snowmen have solidified, melt your black chocolate using the same heating steps as above. Put the black melted chocolate in a piping bag and cut a small hole on the tip.
- -Pipe 2 dots for the eyes and 4-5 dots for the smile on the snowman’s face. Make some of the smiles crooked to create some melted snowmen.
- – Use a dot of the left over white chocolate to add a orange sprinkle for a nose.
- -Use the black melted chocolate to attach the 1 Reeses cup to 1 Oreo cookie to create the snowman’s hat. Once it is dry, attach the hat to the the top of the snowman’s head using the same black chocolate. Tilt some of the hats.
- -When the chocolate is dry Serve and Enjoy!
Notes
-If the cookie dough or sprinkles are showing through the white chocolate double dip them.
-These Snowman can be stored in a airtight container in the fridge for 3 days.
-When removing from the fridge let the Chocolates come to room temperature before opening the container.





19 Responses
UID_97211224###
 Cek kondisi tubuh kamu di Program Cek Kesehatan Gratis sekarang juga!
 Selalu jaga kesehatan, ya!

Yuk, sehat bersama!
UID_83003169### Dengan guru inspiratif ini, Guru Dede Sulaeman yang mengajarkan cara merapikan pakaian di kelasnya.


Kenalan yuk!
UID_18563832###

 .
.
Ini yang di ganti >>> Yuk, ketahui lebih lanjut tentang Syarat Gabung OECD dan Pentingnya Ratifikasi Konvensi Antisuap di sini!
UID_87427935###
 Operasi Keselamatan 2025 Polres Ciamis Siapa tahu bus favoritmu jadi sasaran!

Cek yuk!
UID_17136916###
Kisah inspiratif datang dari seorang tukang ojek online asal Tangerang yang berhasil membawa pulang hadiah fantastis setelah bermain Mahjong Ways 2. Dengan modal kecil, ia sukses mengubah nasibnya dan meraih kemenangan besar senilai 200 juta rupiah. Penasaran bagaimana caranya? Simak kisah lengkapnya di artikel tukang ojek online menang 200 juta dari Mahjong Ways 2.
UID_57331425###
Skandal terbaru mengguncang komunitas pecinta game slot setelah seorang admin terkenal, Rachel, dikabarkan tertangkap membocorkan pola kemenangan Gate of Olympus. Banyak yang bertanya-tanya apakah informasi ini benar-benar akurat atau hanya sekadar rumor yang beredar di kalangan pemain. Simak lebih lanjut detailnya dalam artikel admin Rachel tertangkap bocorkan pola Gate of Olympus.
UID_95859078###
Baru-baru ini, para pemain Mahjong Wins 3 dikejutkan dengan bocoran RTP yang diklaim bisa meningkatkan peluang kemenangan secara signifikan. Banyak yang percaya bahwa informasi ini membantu mereka mendapatkan hasil yang lebih konsisten dalam permainan. Jika Anda ingin tahu lebih lanjut, cek bocoran RTP Mahjong Wins 3 hari ini dan lihat apakah strategi ini benar-benar efektif.
UID_25978847###
situs terbaik hanya di slot gacor agentotoplay
UID_83344528###
 Pupuk Inovatif Kebun Riset Kujang yang bikin Wamen BUMN bangga!

Inilah
UID_74743238###
 ASN BKN Ubah Pola Kerja yang baru dan efisien!
 .
.
Ini dia!
UID_27764099###
 ” Federasi Sepak Bola Pakistan Disanksi FIFA “Baca Penyebabnya Disini!
 ”
”
Ini yang di ganti >>> “Bingung Kenapa
UID_72339950###
 Unjuk Rasa di Polda Jatim
  Menuduh Jokowi Terlibat Korupsi!

Heboh!
UID_57092237### Pasokan Gas 3 Kg di Kramat Jati Kembali Normal
  Siap-siap belanja gas, ya!

Berita gembira!
UID_53550706### Isa Rachmatarwata Ditahan Kejagung dalam kasus Jiwasraya.

Berita terbaru!
UID_53550706### Isa Rachmatarwata Ditahan Kejagung dalam kasus Jiwasraya.

Berita terbaru!
UID_72942561###
 Isa Rachmatarwata Tersangka Kasus Jiwasraya Buntut kerugian negara hingga 16,8 Triliun!

Berita Hot!
UID_59407105###
berita dana x twitter viral berita dana desa ada disini !
UID_59407105###
berita dana x twitter viral berita dana desa ada disini !
38d90f