
Are you ready to hop into the sweetest Easter adventure? Look no further, because today we're about to unlock the secrets of creating irresistible Easter Bunny Chocolate Bars right in your own kitchen! Indulge in a world of melt-in-your-mouth goodness and embark on a journey that will leave your taste buds begging for more. Whether you're an amateur chocolatier or a seasoned pro, this blog post is here to guide you step by step towards crafting adorable treats that will have everyone hopping with joy. So grab your apron, gather your ingredients, and let's dive headfirst into the enchanting realm of homemade chocolate delights!
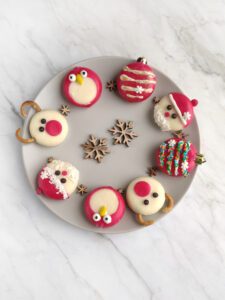
Prepare these bars for the Easter holiday. Your guests and especially your children will be delighted. They are easy to prepare, you don't need pastry bags or special spatulas. The drawing is applied with a simple teaspoon. As a basis you can take your favorite chocolate bars or waffle candies with filling. Those on a diet can choose vegan or gluten-free sugar-free options. We will use white chocolate, various sprinkles and flowers for the design.
You will need an edible pastry marker to draw the faces. For the bunnies' ears we will take marshmallow.
Ingredients:
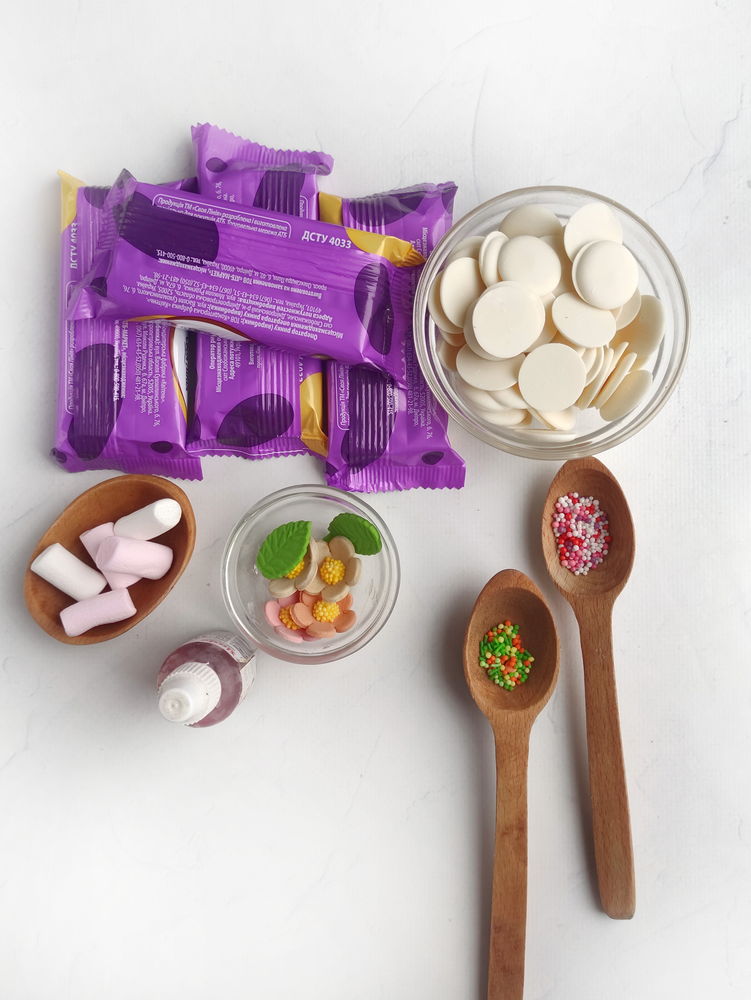
4 bars coated with dark chocolate
4 white + 4 pink marshmallows
2 tbsp. white chocolate drops
4 sugar flowers with a leaf
1/2 tsp. sprinkles
4 mini chocolate drops
2 drops of food coloring
Instructions.
1.Unpack the bars and lay them out on a board.
2. To form the ears, we used a bunny mold. put some pink marshmallow on the mold and added white marshmallow. We pressed it tightly to form an ear. If you do not have such a mold, just form the ears with scissors.
3. Melt half of the white chocolate in the microwave. Add the food coloring and stir. Place half a teaspoon of this chocolate on the bar. Spread gently so that it forms a basket. Place a leaf and a flower and sprinkle with sprinkles before the chocolate hardens. Make baskets on the rest of the bars in the same way. Put the board with bars in the refrigerator for 15 minutes.
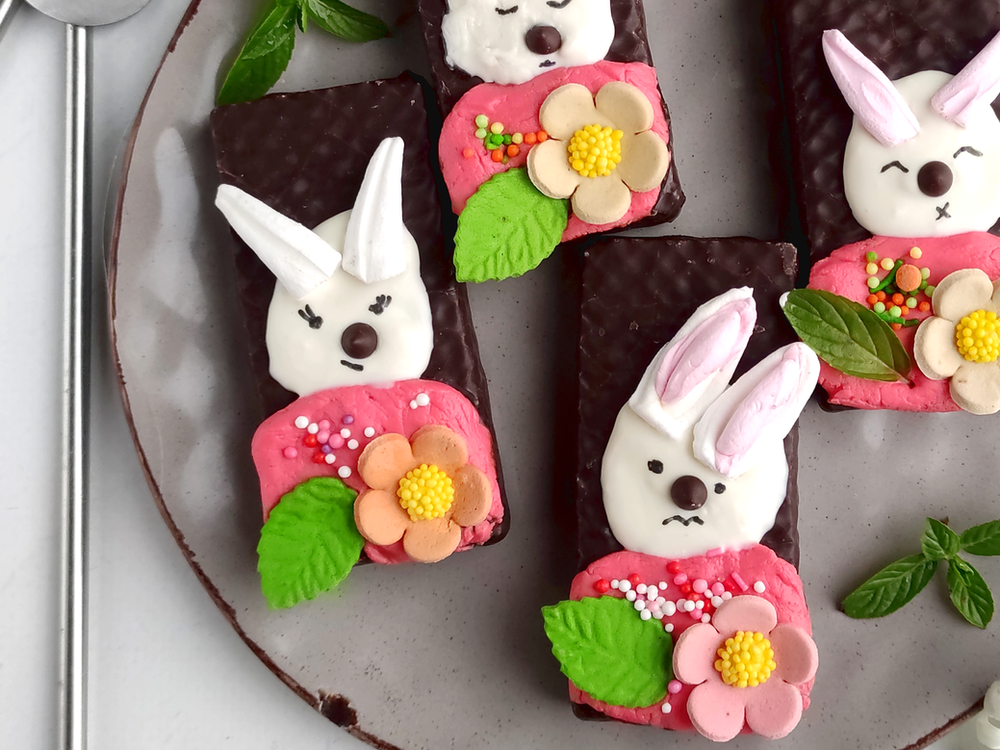
4. Melt the remaining chocolate. Scoop 1/3 tsp. chocolate and shape into a bunny face. Place the ears on the hot chocolate and place the spout. Chill the bars in the refrigerator for 20 minutes and color the faces with a pastry marker. Try to give them different moods to make the bunnies a little different from each other.

Serve the Easter bunnies on sweet boards. The dessert can be wrapped and given as a gift to someone. These bunnies can be hidden and let the children find them. Happy Easter!
As the Easter holiday approaches, many of us look forward to indulging in delicious chocolate treats. And what better way to celebrate than with homemade Easter Bunny Chocolate Bars? While store-bought chocolates may seem convenient, there are plenty of reasons why making your own chocolate bars at home is a worthwhile endeavor.
Making your own Easter Bunny Chocolate Bars is a rewarding and worthwhile activity that offers countless benefits. From controlling ingredients to being creative and cost-effective, it's clear that homemade chocolates are well worth the effort. So why not give it a try this Easter and see for yourself? Your taste buds – and your loved ones – will thank you!
easter-bunny-chocolate-bars